
You want a box around one warning. You want slightly less space under a heading. Writing stops, and layout takes over. Deciding up front whether to touch HTML at all saves you the afternoon.
Short answer: Shopify's built-in rich text editor has a Show HTML button, and you can rewrite the post's markup in place. But Shopify automatically corrects markup it considers risky, so what you type does not always survive the save. Smart Agent Blog takes the other route — design editing changes how a block looks without code, and Add Custom Block builds your own block from HTML and CSS. Both are paid-plan features.
This guide covers the built-in editor properly first, then shows where you can get the same result without writing a line.
- How to edit post markup with Show HTML, step by step
- Why Shopify rewrites HTML on save, and what to check afterwards
- Three checks to run before you touch HTML at all
- How design editing, the Code block, and custom blocks differ
- A side-by-side comparison and a pre-publish checklist
People reach for HTML when the formatting options run out
While preparing proposals for Smart Agent Blog in August and September 2026, we reviewed the blogs of 110 Shopify stores in Japan. Across the 113 posts we recorded, not one used a card that pulls together a product's name, image, and price.
Building that kind of card with the built-in editor alone means writing HTML. So "I need to edit the HTML" usually is not about HTML at all — it is about running out of formatting options. That is worth a pause before you start typing.
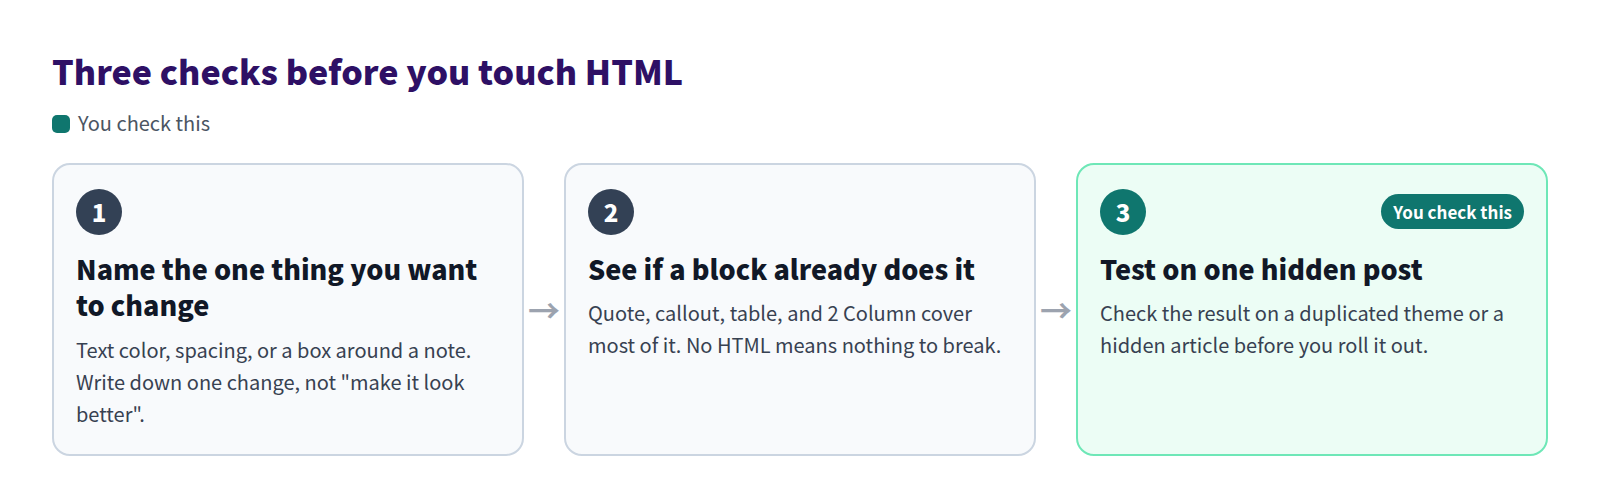
The second check does most of the work. If a quote, a callout, a table, or a 2 Column layout gets you there, skip the HTML — it is faster and nothing breaks. We cover boxes in callout blocks for important notes, side-by-side data in comparison tables in Shopify blog posts, and image-plus-text layouts in two and three column layouts.
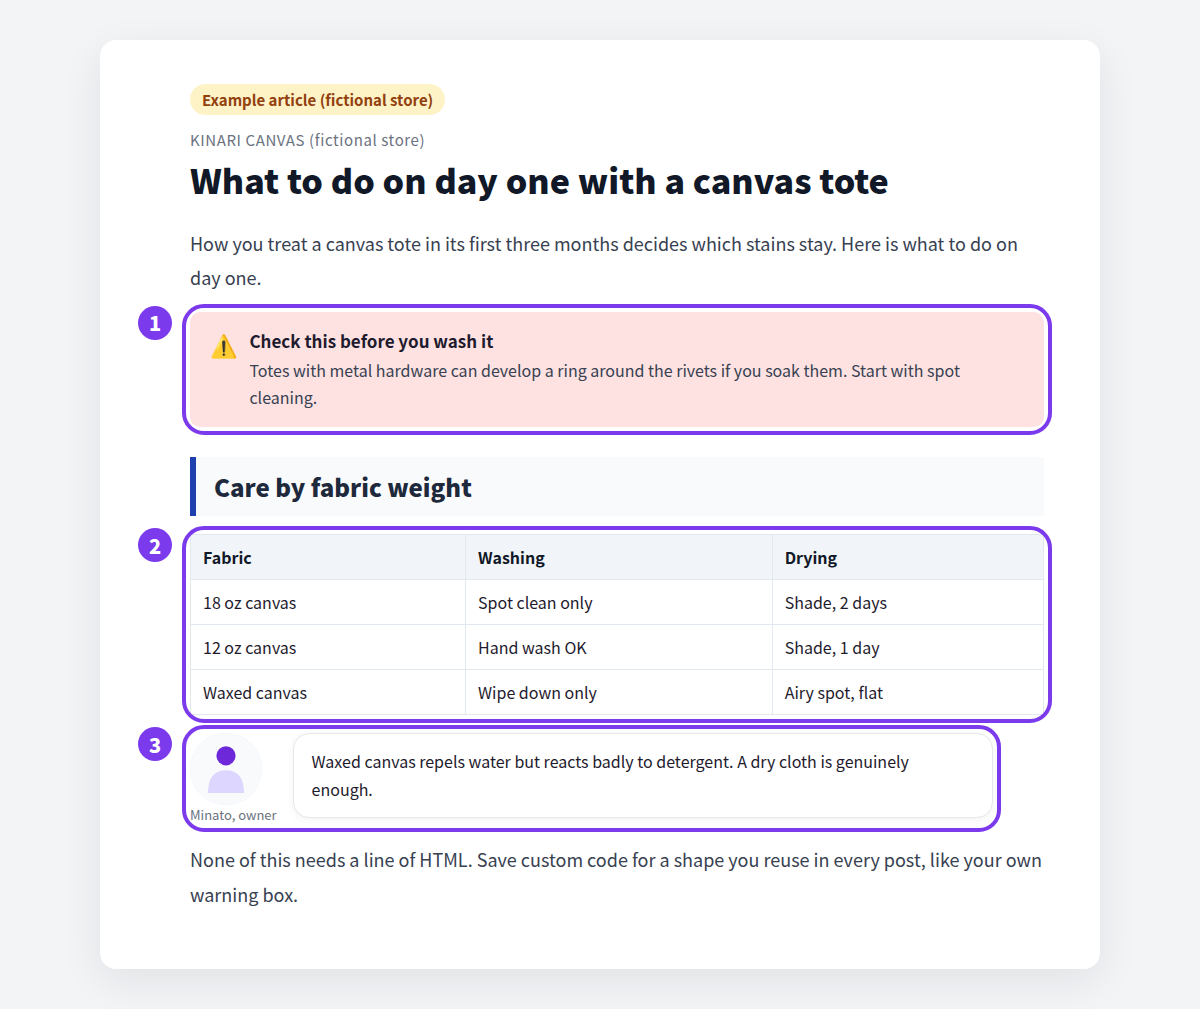
Here is what that range looks like in a finished post. This is a fictional store, used as an example.
What Shopify does on its own
In Shopify admin, open Content → Blog posts and select a post. The body uses the rich text editor, which handles both visual formatting and direct HTML editing.
What the toolbar offers
According to the Shopify Help Center, the rich text editor toolbar includes:
- Formatting (paragraph, headings 1–6, blockquote)
- Bold, Italic, Underline, Color, Clear formatting
- Bulleted list, Numbered list, Indent, Outdent, Alignment
- Insert table, Insert link, Insert image, Insert video
- Show HTML
Tables are supported out of the box. It is a common misconception that Shopify cannot do tables — you do not need HTML for a comparison table.
Editing with Show HTML
- In Shopify admin, open Content → Blog posts and select the post you want to edit.
- In the body toolbar, select Show HTML. The post's markup appears.
- Edit the part you want to change. The Help Center describes this view as the place to view the HTML and remove markup that is causing a display problem.
- Select Show HTML again to return to the normal view and confirm the result.
- Select Save.
An empty paragraph leaving a gap you cannot delete, or styling that came along with text pasted from elsewhere — these "make it go away" jobs are fastest here.
Your markup may not survive the save
Shopify's rich text editor runs content filtering that automatically corrects HTML which could malfunction on the storefront or create a security risk. The Help Center recommends accepting those automatic corrections.
There is one practical consequence: after saving, open Show HTML again and confirm your markup is still there. If it is gone, that is the filter doing its job, not a bug. You will need another way to get the same look.
What the built-in editor cannot do
- Generate a table of contents from your headings and keep it updated
- Place a product card with name, image, price, and stock status
- Save a look as a reusable block you can call up in the next post
Links are inserted by typing a URL, so a product mention stays a text link in the sentence.
Where hand-written HTML stops scaling
Fixing one post is fine. The trouble starts once you have a shelf of them.
- You paste it again every time. The same box across ten posts means ten pastes.
- Theme updates change how it renders. Post markup sits inside the theme's CSS.
- The next person cannot touch it. Code does not say which parts are safe to edit.
- It breaks on phones. Fixed pixel widths overflow on a 375px screen.
On phone rendering, see making Shopify blog posts readable on mobile.
Advanced editing in Smart Agent Blog
Smart Agent Blog builds the body out of blocks. Advanced editing applies to a block, not to a blob of markup.
Design editing (the pencil icon)
Headings, quotes, callouts, and speech balloons in the insert menu carry a pencil icon. That is design editing: it changes how the block looks, from the screen, with no HTML or CSS.
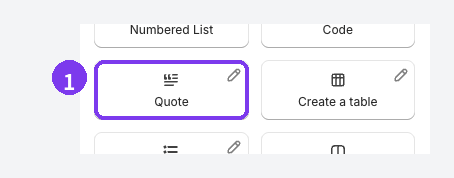
Heading underline color, the rule beside a quote, callout background — the "make it feel like our store" layer lives here, and you set it once instead of per post.
The Code block shows code, it does not run it
The Code block in the insert menu displays code exactly as written, for readers. HTML you put there does not execute on your storefront. Use it when a post explains how to write a tag.
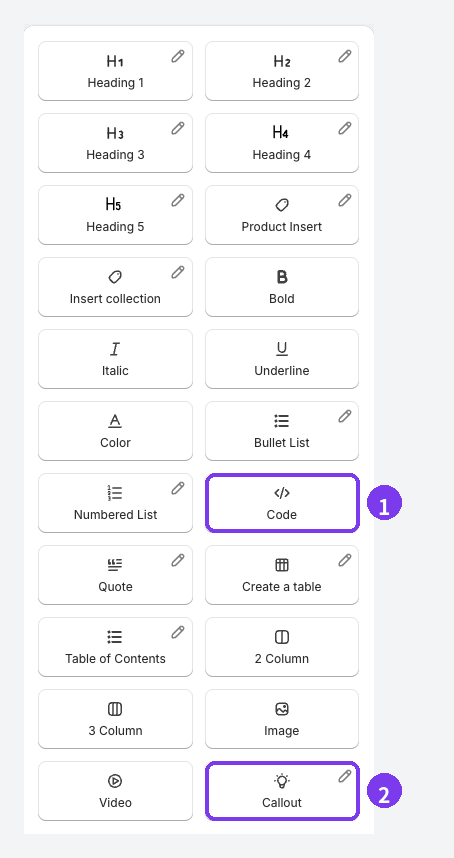
Add Custom Block
Add Custom Block, at the bottom of the insert menu, builds your own block from HTML and CSS. It suits shapes you reuse — a house-style warning box, a recurring heading ornament.
The rules:
- The HTML
styleattribute is accepted - JavaScript cannot be used
- Liquid is not processed; the tag appears as plain text
This needs real HTML and CSS knowledge and can break the storefront, so skip it if you are unsure. Never paste code from a source you do not trust, and test on a duplicated theme or a hidden article first. The full procedure is in safely switch from your existing blog.
Design editing and custom blocks are both paid-plan features; on the free plan a notice appears when you try to use them. Block-by-block instructions live in add content to an article.
The two routes, side by side
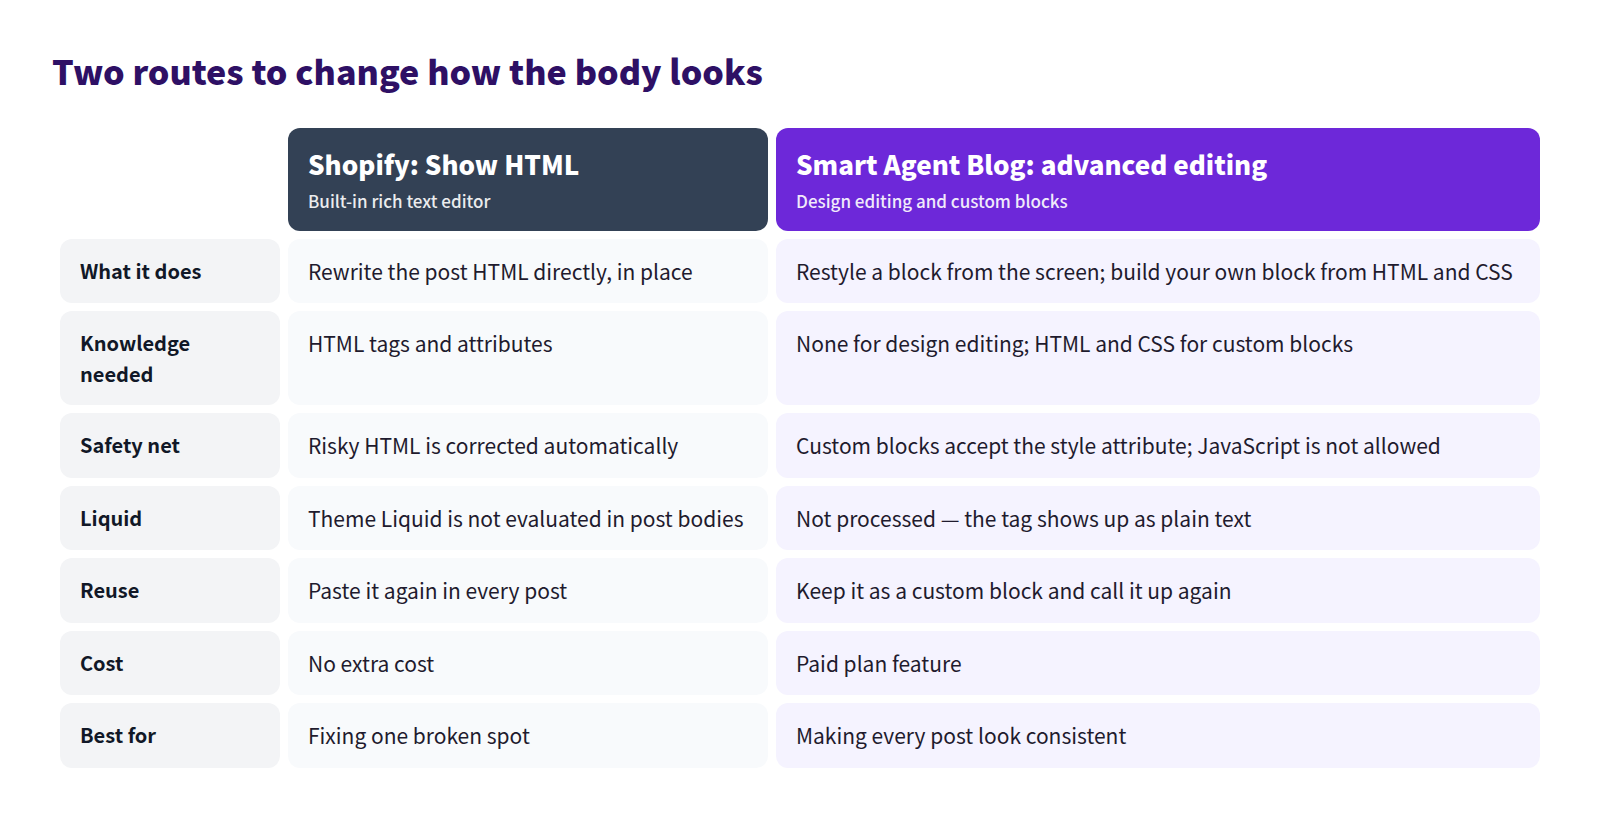
This is not an either-or. Use Show HTML to fix one broken spot; use blocks to make every post look the same. For the whole writing workflow, see how to write a Shopify blog post. For styling with stylesheets, see custom CSS for Shopify blogs.
Before you publish
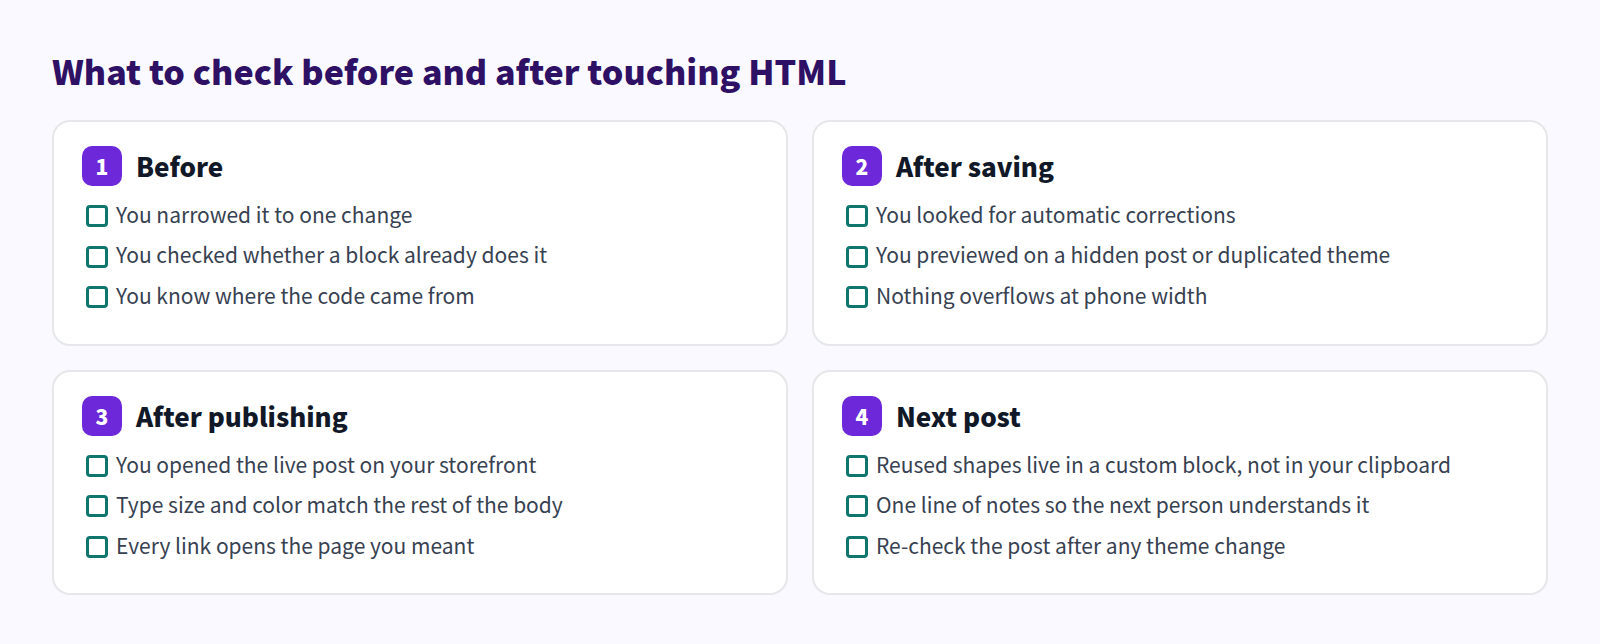
The easiest one to skip is reopening Show HTML after the save. If the filter changed something, you would otherwise find out after the post is live.
FAQ
Will the HTML in my existing posts disappear if I install the app?
Articles that appear in the Smart Agent Blog article list can be opened and edited. Posts containing unusual markup or content specific to another app may render differently, so check on a hidden article or a duplicated theme before switching your live theme.
Can a custom block contain JavaScript or Liquid?
No JavaScript. Liquid is not processed — the tag shows up as plain text. What works is HTML, CSS, and the HTML style attribute.
Can I try advanced editing on the free plan?
Design editing and custom blocks are paid-plan features, and a notice appears on the free plan. The blocks themselves — headings, quotes, callouts, speech balloons, tables, columns — work on the free plan, so check whether those are enough first. Plan conditions are listed in plans and usage limits.
Summary
- The built-in rich text editor has Show HTML, and you can edit post markup directly
- Shopify automatically corrects risky markup, so reopen Show HTML after saving and confirm
- Before writing any HTML: narrow it to one change, check whether a block does it, test on a hidden post
- In Smart Agent Blog, design editing handles the look and custom blocks hold the shapes you reuse (paid plans)
Write down the single thing you most want to change, then check whether a block already does it. That one step decides whether you need HTML at all.