
The first thing a reader does when they open a post is not read it. It is glance at the scrollbar to work out whether this is a short one. If it looks long, a lot of them leave before they have read a sentence.
The short answer: Shopify has no setting, in admin or in theme settings, that displays an estimated reading time. What you can do on your own is write it into the intro yourself, show the shape of the post with a table of contents, or edit theme code. In Smart Agent Blog, one checkbox in General Settings calculates it from the article text every time you save. This guide covers all of it, plus the part people get wrong afterwards.
- What changes for a reader when the length is visible up front
- What Shopify can do on its own — intro text, a table of contents, theme code — and where each stops
- How to turn on estimated reading time in Smart Agent Blog
- Why it does not appear on your older posts
- What to pair it with so long posts actually get read
What happens when length is invisible
We reviewed the blogs of 110 Shopify stores in Japan in August and September 2026 while preparing Smart Agent Blog proposals. Of the 78 posts where we recorded heading use, 27 (about 35%) had no headings at all, and several long posts with 13 to 16 headings had no table of contents.
A post with no headings and no contents list reads, from the outside, as an undifferentiated wall of text of unknown size. Deciding whether to start on that is genuine work, and plenty of people decline.
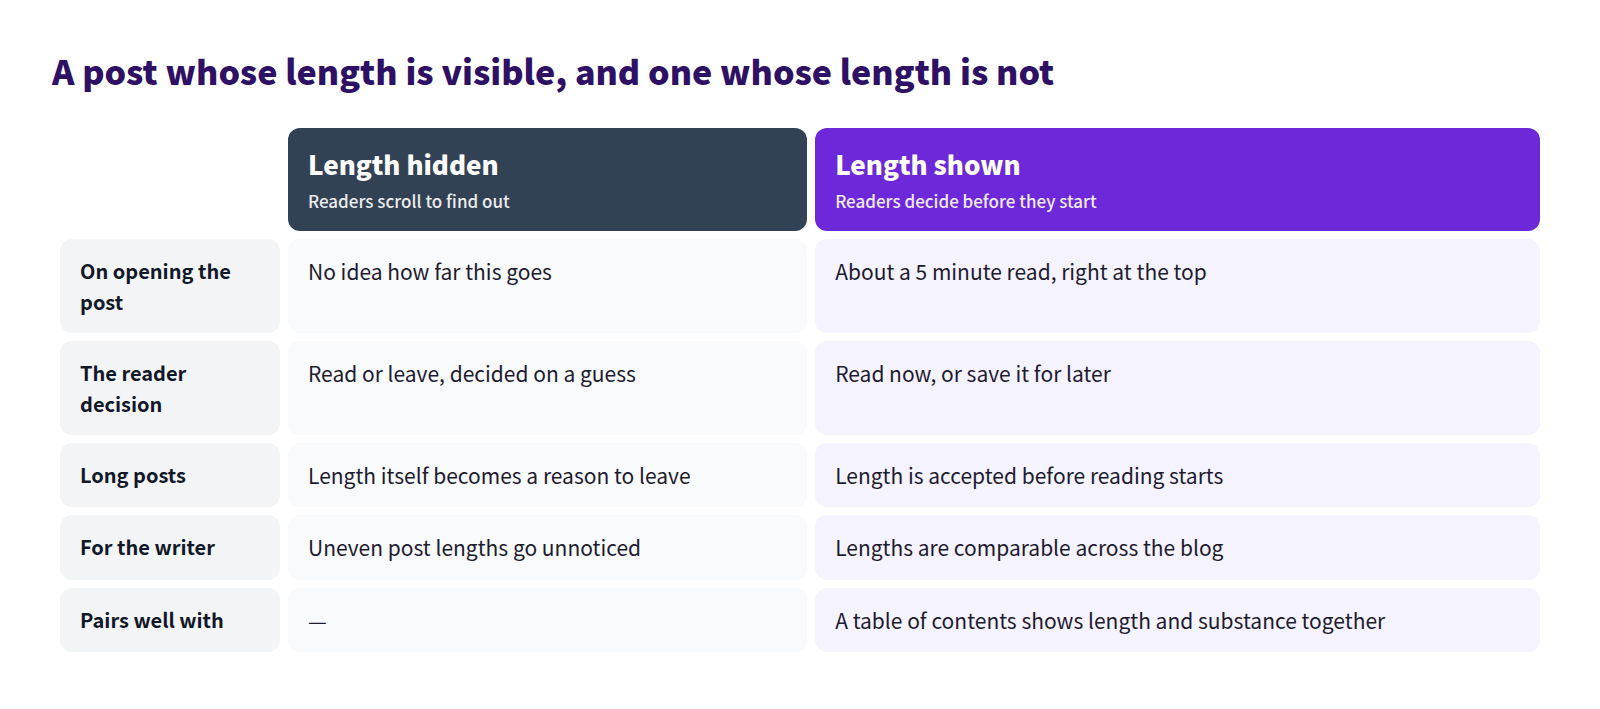
A reading time is information that removes that work. It is not a guarantee of lower bounce or more engagement — treat any such promise with suspicion. It simply gives the reader one more thing to decide with. And long posts are not the problem: someone who starts a post knowing it is a fifteen-minute read has already decided it is worth fifteen minutes.
What Shopify can do on its own
Shopify's blog post feature has no estimated reading time setting, and there is no standard theme setting for one either. That leaves three approaches.
1. Write it into the intro yourself
The simplest and most reliable option. Put one line at the top: "About a 5 minute read, covering how to choose a size."
For English text, 200 to 250 words per minute is the usual working assumption. It does not need to be exact. What a reader wants to know is the order of magnitude — three minutes or fifteen — not whether it is six or seven.
The upside is that it depends on neither your theme nor any app. The downside is that every time you revise a post and change its length, you have to remember to revise the line. Past ten or so posts, some of them will be wrong.
2. Add a table of contents
Not the length exactly, but a contents list tells a reader what is covered and how far it runs, and lets them pick where to start.
Shopify's standard rich text editor has no automatic table of contents. You open the HTML view, add an ID to each heading, and hand-build the anchor links — then update them by hand every time you add or rename a heading. Adding a table of contents to Shopify blog posts compares the options.
3. Edit theme code
You can also edit the theme to count the words in the article body and render an estimate. Shopify's Help Center is direct about the prerequisite: edit theme code only if you know HTML and CSS and have a basic understanding of Liquid, and consider hiring a Shopify Partner otherwise.
Three things to weigh:
- A theme update can wipe the edit
- Switching themes leaves the code behind
- Changing the placement or the calculation means going back into the code each time
Where the built-in options stop
Summed up: you either write it by hand or you write code.
Writing by hand fails quietly as the blog grows, because stale numbers look exactly like current ones. Writing code works if someone on the team can, but needs rechecking after every theme update. What you cannot get out of Shopify alone is the state where saving the article updates the figure automatically.
How this works in Smart Agent Blog
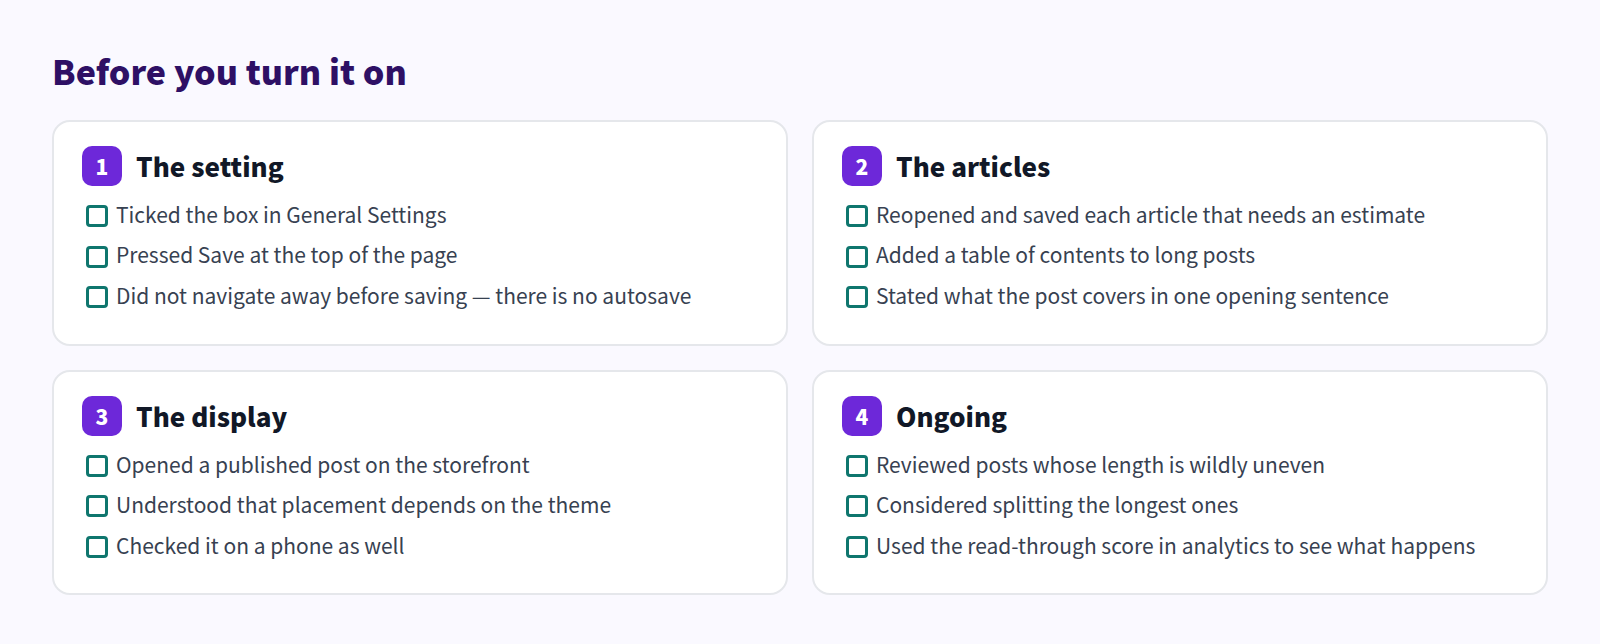
Tick one box and the reading time is calculated from the article text every time the article is saved. Rewrite the post, save it, and the number follows.
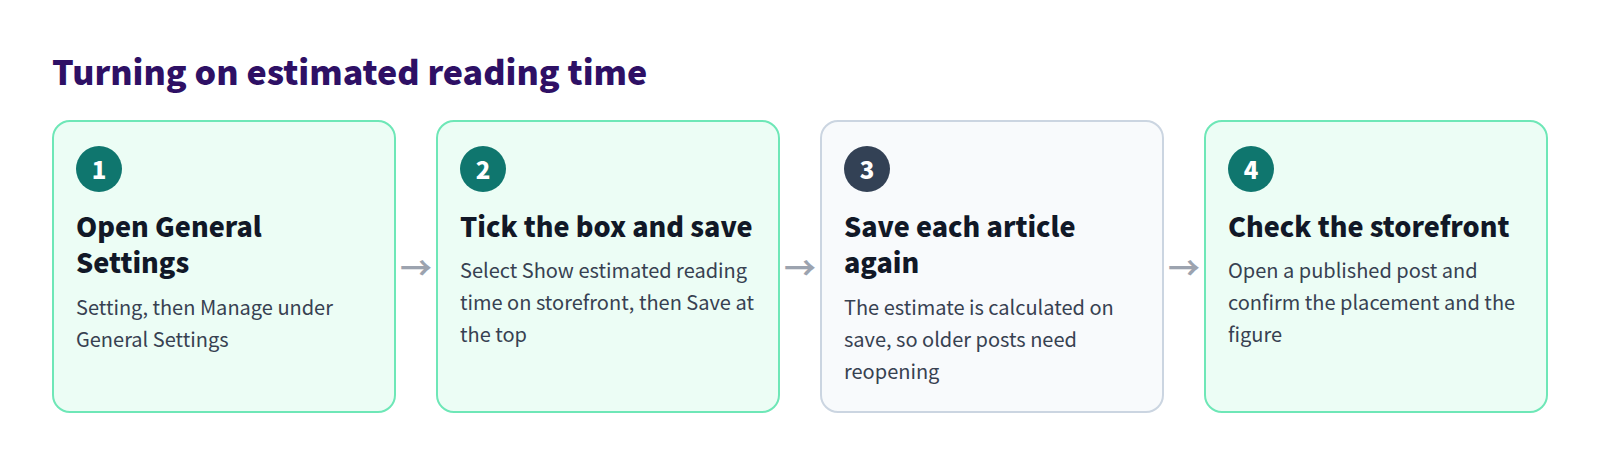
Open General Settings
From the left menu, open Setting, then Manage under General Settings. The page is split into Notifications, Estimated Reading Time, Google Search Console Integration and Social Share Links.
Tick the box and save
Under Estimated Reading Time, select Show estimated reading time on storefront.
Save then appears at the top of the page — in the save bar at the very top and next to the page title, either one works. Nothing appears at the bottom of the page. There is no autosave, so navigating away without saving loses the change.
Save each article again
This is the part that catches people. The estimate is calculated from the body text at the moment Smart Agent Blog saves the article.
Turning the setting on does not retroactively add an estimate to posts published before. Open each post you want it on and press Save again. There is no bulk conversion.
You can see how much text a post holds from the counter in the body field.

One caution: opening an existing post in the app and saving it overwrites the body, title, author, tags and SEO fields with what the screen holds, and an author is preselected automatically. Check before saving. See How to install a Shopify blog app for the full list.
Check it on the storefront
Open a published post on your store. Where the estimate appears depends on your theme settings. If it does not appear at all, see the estimated reading time section of Article cannot be saved or displayed. The setting itself is documented in Change general settings.
What to pair it with
A reading time on its own does not make a long post readable. These three together let a reader decide how much of it to take on.
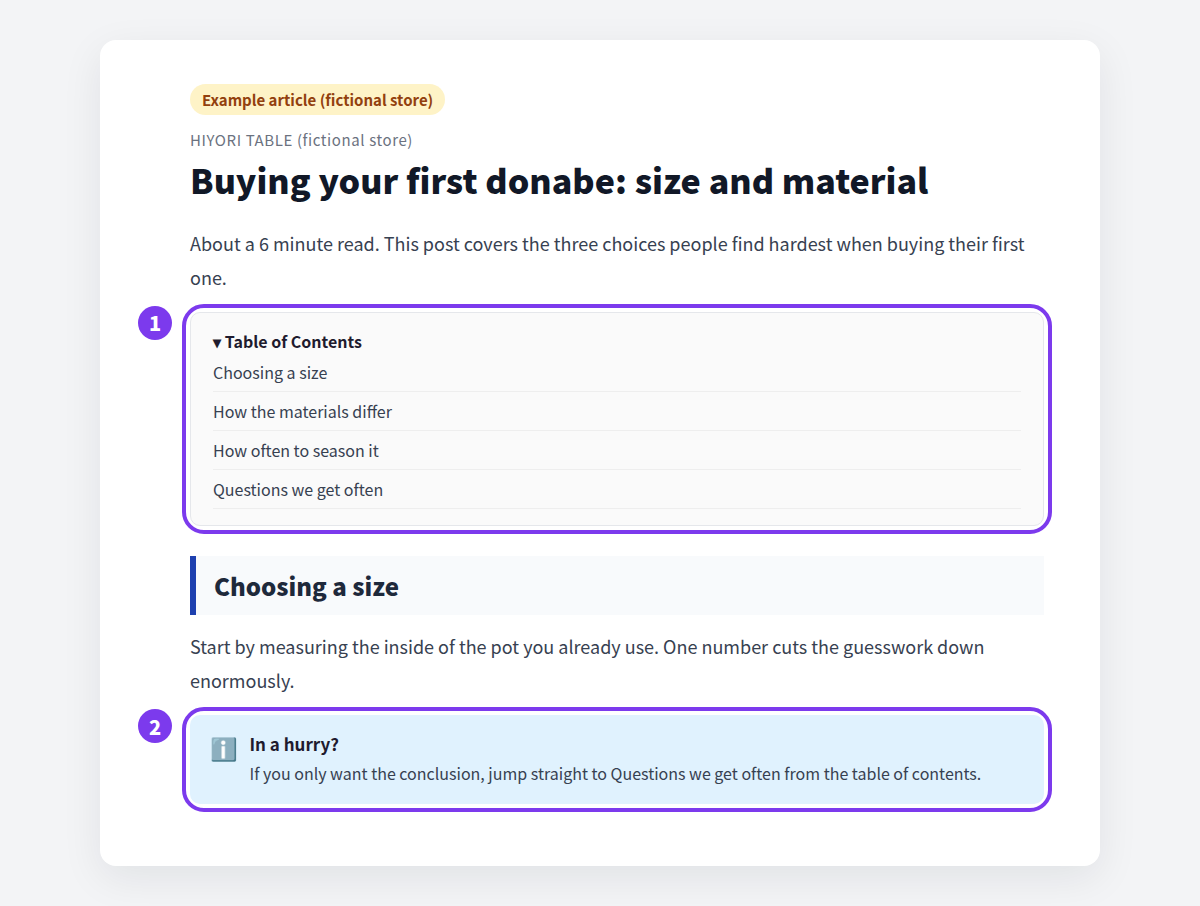
- A table of contents built from Heading 2 to Heading 4, updating itself when the headings change
- A callout that points a reader in a hurry straight at the conclusion
- An opening sentence that says in one line what the post answers
Whether any of this is working shows up in the read-through score and scroll depth in article analytics, on the Pro plan. See Improving where readers drop off.
The checklist
Common questions
How is the estimate calculated?
From the amount of text in the article body, automatically, at the moment the article is saved or updated. Turn the setting on and posts you have not saved since may show nothing until you save them again.
Can I move where it appears?
Placement comes from your theme settings. What appears above, below and beside the article is configured on the Smart Agent Blog section in the theme editor — the full list is in Display articles on your store. To confirm your theme supports the section at all, see Shopify blog theme compatibility.
Can I apply it to every post at once?
No. Open the posts you want it on and save them one at a time. Working down from your most-read posts is the practical order.
Summary
- Shopify has no built-in estimated reading time display
- On its own, you either hand-write the line or edit theme code
- In Smart Agent Blog, tick the box in General Settings and save each article again
- Reading time works best alongside a table of contents and a clear opening line
Tick the box, save, then reopen your single most-read post and save it. You will see the result on the storefront straight away. For the whole process of building a post, see How to write a Shopify blog post.