What you can do with Smart Agent Blog
Smart Agent Blog helps you create and improve Shopify blog articles. Without writing code, you can combine text, images, product information, and other content.
Main areas
Create articles
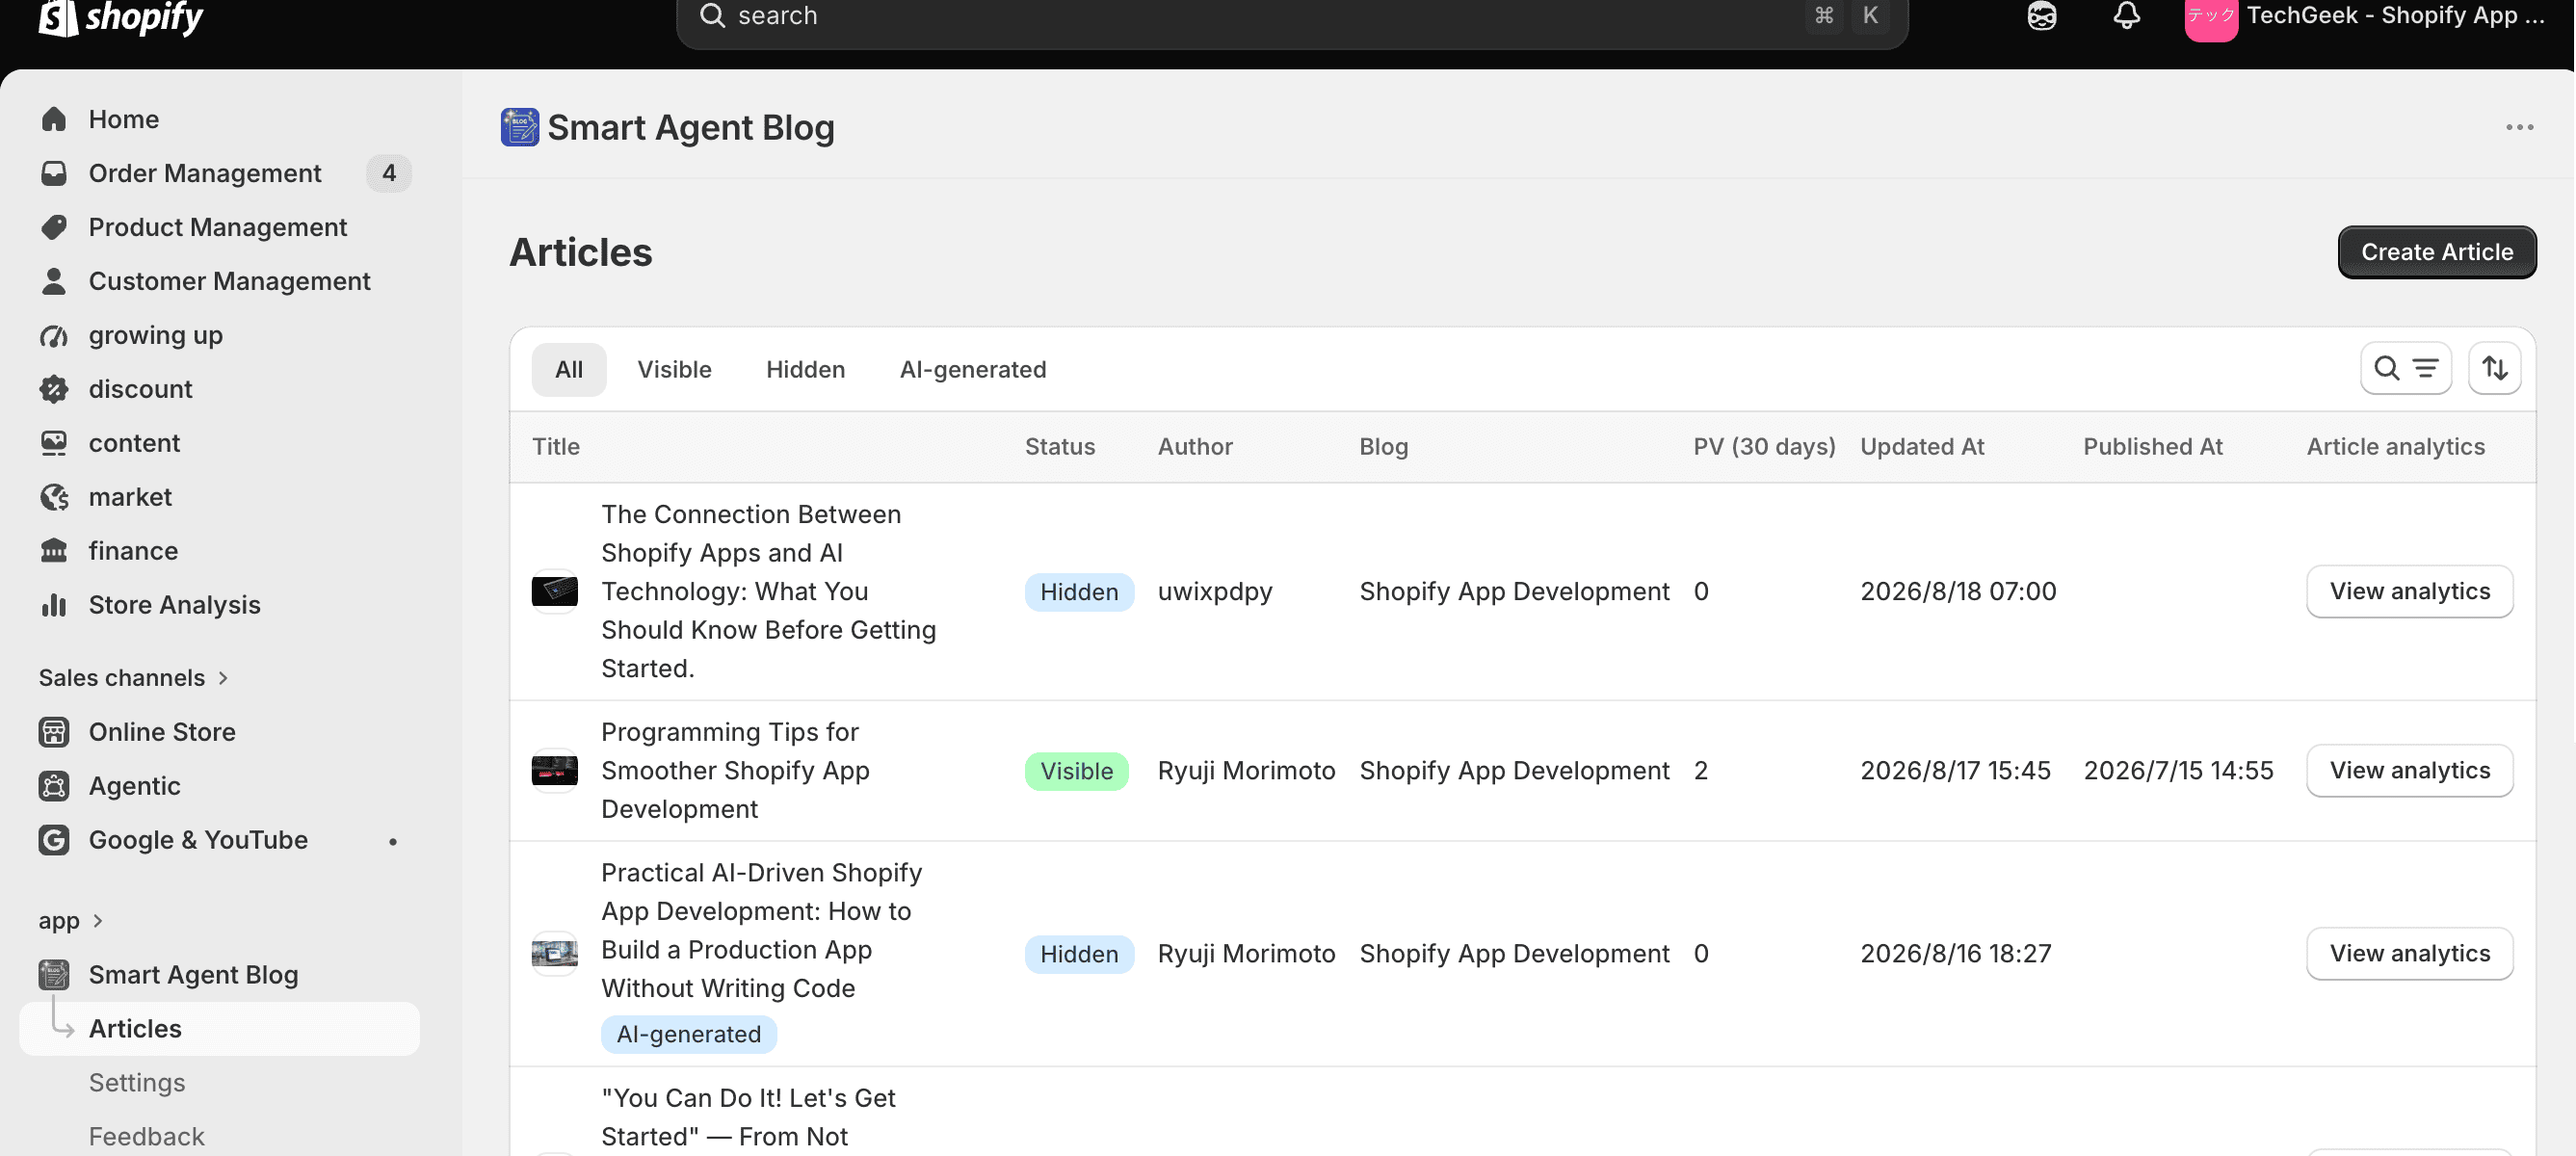
Combine headings, text, images, videos, tables, a table of contents, products, callouts, speech balloons, and two- or three-column layouts. Articles are saved to a Shopify blog. The article list supports title search, visibility and AI filters, and sorting by updated date, published date, or page views.
Ask AI to suggest articles
With AI Scheduled Blog Proposals, enter your business overview, target audience, themes and keywords, products to reference, and the day and time. Choose Save as draft (manual publish) so you can review each proposal before publishing it.
Improve existing articles
AI Rewrite proposes improvements to existing articles. In the recommended approval mode, the original article does not change immediately. Compare before and after, then accept or keep each change. AI Rewrite requires a paid plan.
Review article performance
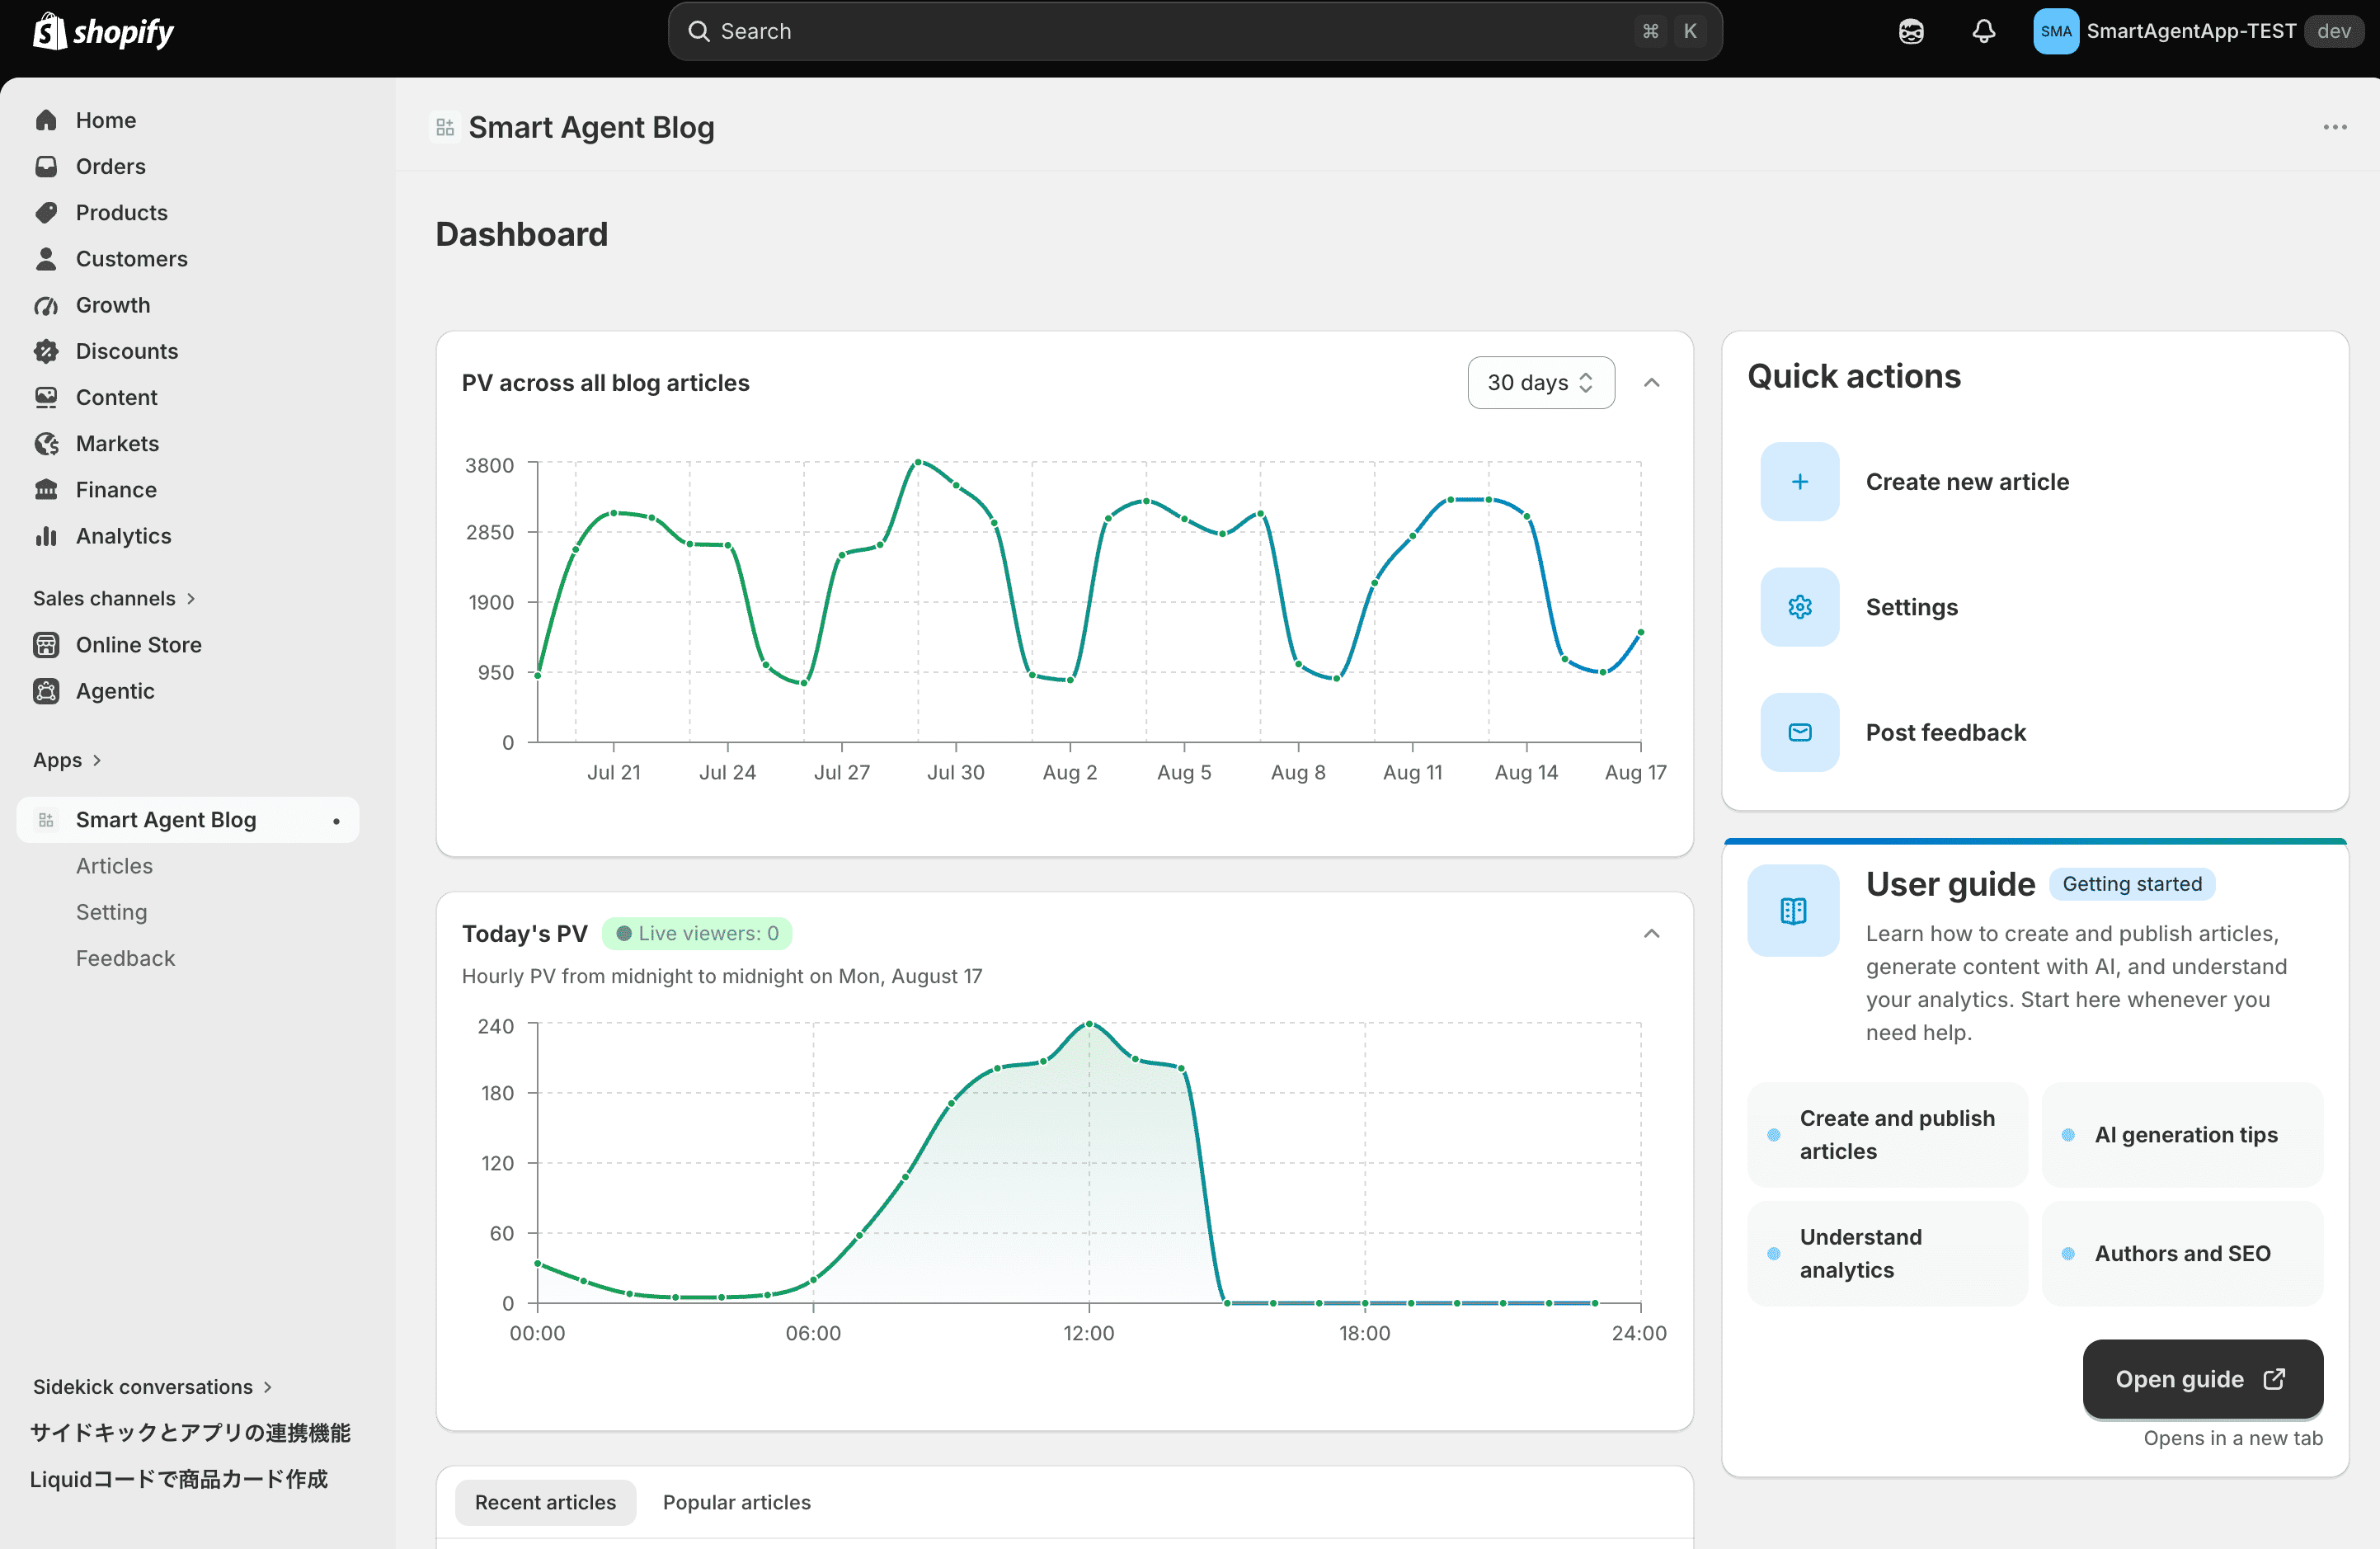
The Smart Agent Blog home screen shows page views for 7, 30, and 90 days, today's hourly views, recent and popular articles, and AI run history. Article analytics shows goal achievement, four diagnostic scores, recommendations, and detailed reading metrics. Article analytics requires the Pro plan, although development stores may see it regardless of plan.
Main menu
The app menu has four items:

- Smart Agent Blog: opens the home screen with page views for the whole blog, today's hourly page views, recent articles, popular articles, and AI run history
- Articles: find, create, edit, preview, and publish articles
- Setting: opens the settings screens for general settings, AI features, authors, and plans
- Feedback: send a request or report a problem
Article analytics is not a menu item. Open it with View analytics on a row of the article list, or with the same action inside the article editor. Article analytics requires the Pro plan. Development stores may see it regardless of plan.
Use View analytics in the article list or article editor; it does not have its own item in the left menu.
Terms such as PV, SEO, and goal achievement are explained in the Glossary. You do not need to memorize them before starting.
Opening Setting shows five entry points:
- General Settings (notification email, estimated reading time, Google Search Console, social links)
- AI Scheduled Blog Proposals
- AI Rewrite
- Authors
- Manage pricing plans
Plans change what is available
Article limits, the number of AI proposals and rewrites, and access to article analytics differ by plan. See Plans and usage limits.
Important precautions when using AI
AI may produce information that is inaccurate or does not apply to your products. A store operator must check product facts, claims, images, and links.
- Confirm product names, prices, materials, sizes, and stock.
- Remove unsupported claims about effects or performance.
- Check that the wording matches your store.
- Make sure the text does not copy another company's content.
Next steps
Start with Check the initial setup. If your store already has articles, follow Safely switch from your existing blog before creating your first article. The app also includes a getting started tutorial, which you can open from Initialize Tutorial in the welcome banner. This button resets tutorial progress to the beginning.