Create your first article
This walkthrough saves a short article as hidden, previews it, and then makes it visible.
You can check the storefront appearance without showing unfinished content to customers.
1. Open a new article
- Open Articles in Smart Agent Blog.
- Select Create Article in the upper-right corner.

The page heading changes to Write a blog post when the new article editor opens.
2. Enter a title and body
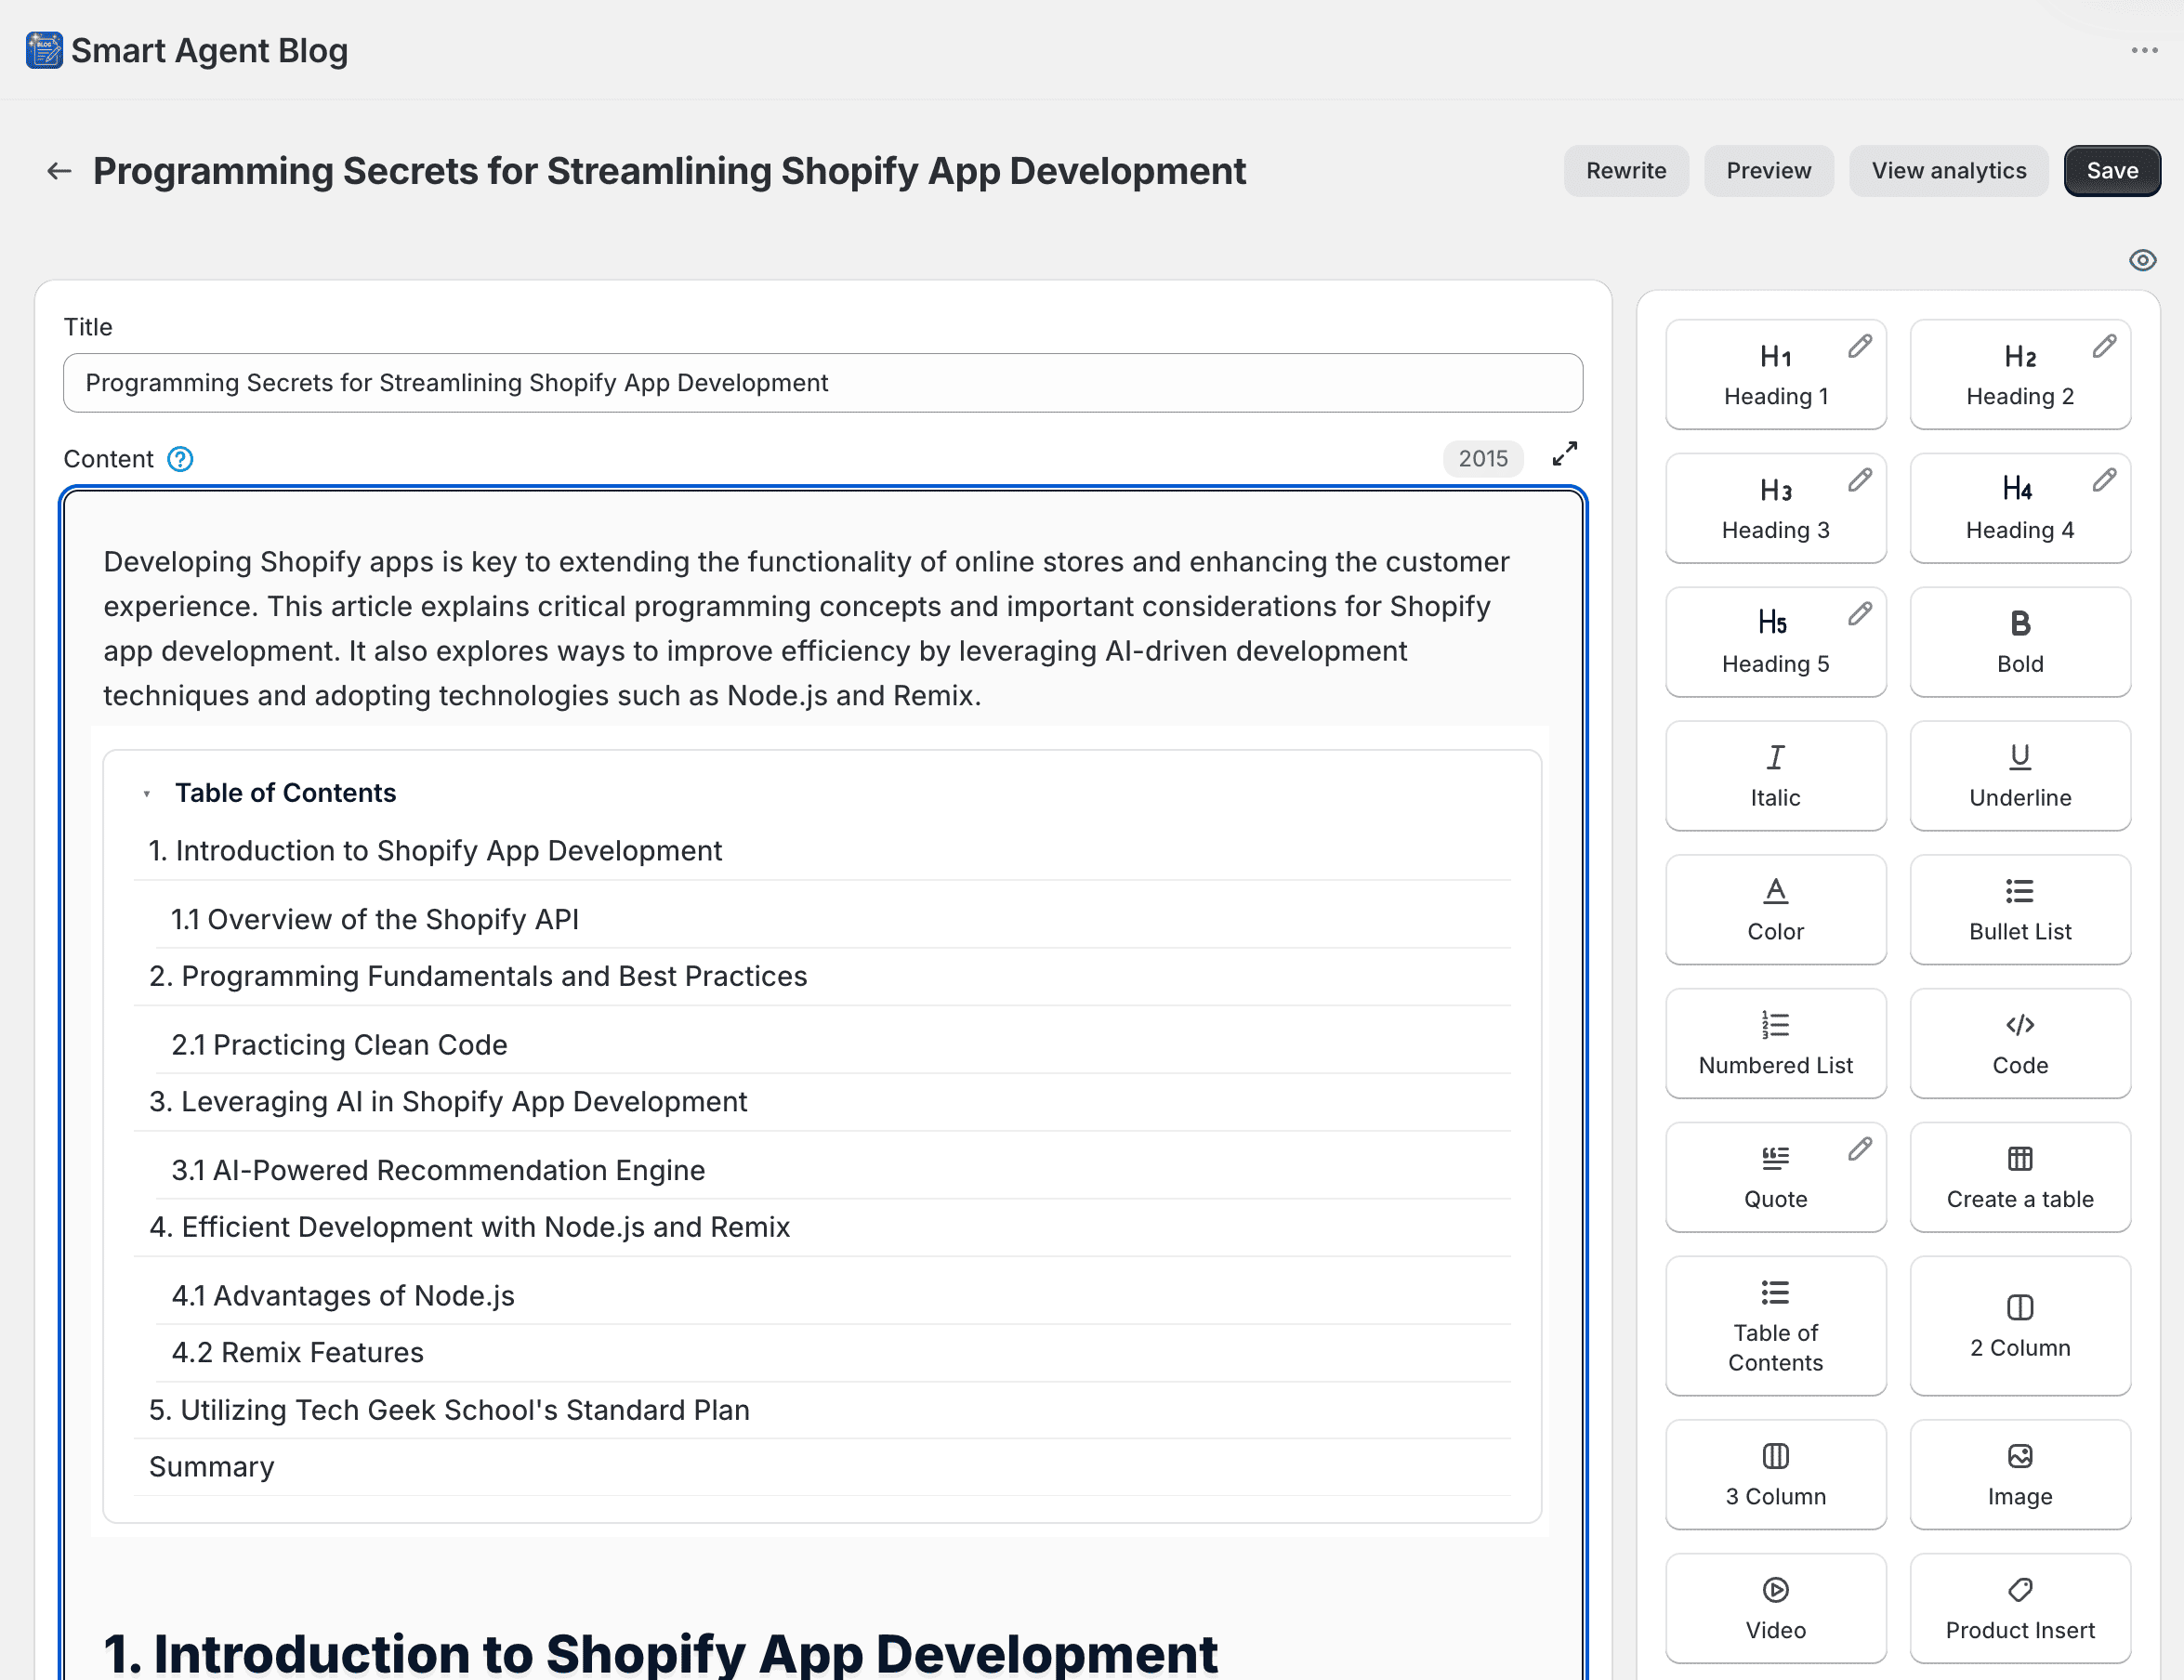
Enter the Title, then write the Content. On a new line, type / to choose a heading, image, product, or another content block. The same blocks are listed in a panel on the right, which you can hide with the icon above it.
The character count and a full-screen toggle sit above the editor. See Add content to an article for the full block list.
3. Complete article settings
Work down the right column:
- Select Hidden under Visible / Hidden.
- Add an Article Thumbnail if you have one. Images must be 4 MB or smaller.
- Choose the Author.
- Choose the destination Blog.
- Add Tags if needed.
- Leave Online Store → Theme template unchanged unless you have a reason to switch it.
A new article opens with the first registered author and blog already selected. Confirm both before saving. Use Create New Author or Create New Blog below those fields to add more; each opens in a new tab.
4. Prepare the search result
The Search engine listing card below the editor previews the search result and holds three fields: SEO Title (falls back to the article title when blank), SEO Description, and the URL handle. If unsure, reuse the article title as the SEO title and summarize the article in one or two sentences.
5. Save
Select Save in the upper-right corner, or use the save bar that appears after you edit anything.
If a required field is missing, the article is not saved and a message appears:
| Message | What to do |
|---|---|
| Please enter article title | Fill in Title |
| Please enter article author | Choose an Author, or register one first |
| Please select blog | Choose the destination Blog |
| The data size is too large… | Use a smaller thumbnail or smaller images |
Confirm the article list shows Hidden.
6. Preview
Preview appears only after the article is saved. Reopen the article and select Preview in the upper-right corner. Choose a theme — the published theme or any unpublished theme — and select Preview to open that theme's editor in a new tab.
You can also hover a row in the article list and use the eye icon: Preview for hidden articles, View article for visible ones.
Check text, images, product information, mobile readability, and the author display.
The Smart Agent Blog layout only applies after you add its section to the theme. See Display articles on your store.
7. Make the article visible
When the preview is correct, select Visible and save again. Open the storefront article and check the final result.
If something goes wrong
If something goes wrong, see Article cannot be saved or displayed.